The Right Way to Build an Inventory in Airtable

Hi Mai! Here’s one way to do it:
Create a rollup field for received quantity in the Products table that is filtered to a specific location, like this:

Then a sold quantity rollup filtered the same way:

Then an In Stock formula for that location which subtracts the sold from the received:
Screenshot 2023-06-21 at 9.17.15 PM

You can repeat those steps for all locations. Then surface just the “In Stock” fields in the gallery like this:

If you wanted to have one field which just lists the locations with stock of an item, write a formula that uses if statements to check if each location is in stock:
Screenshot 2023-06-21 at 9.29.33 PM

Then surface that field in the gallery:

Here’s the example base I used

Hi Julian,

Thanks for all the super helpful information! I am about to finish my dashboard and wanted to ask a final thing.

I created a total of 3 tabs:

  1. Teams requests - has a form to fill a new item request
  2. Received items - has 2 forms: restock form and leftovers form (for extra items that were not fulfilled at one of our events)
  3. Distributed items - includes a distribution form to report when an owner send items from stock following a team request or an event that is coming up.

As you can see the situation is the following:

An employee sends a request via form - > the owner orders items and restocks (quantities go up) → the owner distributes items as necessary to the request (quantities go down) → the employee or the event owner has leftover items post-event. He sends back the items to stock (quantities go up again).

I wanted to ask what is the best way to build it. I added a location to each form that will give us an indication of items location. How should I create such complex location tracking and quantities?

For example, I ordered 50 pants for storage, kept 25 at the storage, and distributed 25 to the warehouse and at the end of the event I sent back 10 back to the main store.

Hi Mai,
If I’m understanding your question right, the way to achieve this is to make a new transaction (received record OR distributed record) every time a quantity is moved. If you’re moving items internally, you need a received record AND a distributed record for each move. So if you distribute 25 to the warehouse from storage, distribute 25 from storage, and receive 25 to the warehouse. When you return 10, distribute 10 from the warehouse and receive 10 to storage.

What might be the trickier question is how to avoid having to fill out two forms for each transaction. To do that, I’d set up an automation that automatically creates the second record. For example, you create a form called ‘Distribute Internally’ which creates a distributed record. Then, you create a new linked record field in the distribution table called ‘Distributed to’ that’s linked to the locations, and include it in the form. Create an automation that triggers when that form is filled out, and creates a received record for the same item and quantity, at the ‘Distributed to’ location. That way you get both sides of the transaction, but you only need to fill out one form. If you want to keep the number of forms down, you could use your existing distribution form and add the ‘Distribute to’ field as optional.

Hi Julian,

That makes sense but there is another element that needs to be addressed. When I feel out of the distributed form how will it know when to abstract the quantity located in a specific location? meaning I need to have an indication of the location it was held and the location it was distributed in order to get the result that I want. it makes sense to create a record of received items anytime I distribute one but it’s not a complete flow.

Please be reminded that a received record can be received as the following:

  1. an order was placed
  2. A surplus item was sent back to the picked location
  3. As you suggested any time that a distribution form is submitted create a received record

But how is there a connection between the first and last point meaning the quantity of a specific order and owner-item received following a new record that was created on the distributed form

That’s why you need to create a new Location field ‘Distribute to’, like I outlined above. That field can be used in your automation to fill out the received record. So this means that in your Distributed table, you have two location fields. One is for the Distribution (where the item is coming from) and one is ‘Distributed to’ (where the item is going to). That second field isn’t actually used to calculate anything, it’s simply used by the automation to supply the location for the Received record. I think you’re almost there, but If you want to go over it in detail you can hire me for a 1:1 here.

Previously on youtube:
Jeremy asks: Hi Julian, thank you for this video, it’s super clear, helps me a lot to create my Airtable database to organize my nursery (I grow fruit trees). One question: in your example how would you handle it if you had different sizes for your products, such as S, M, L, XL ? I guess you would have one line per unique product, like Green T-Shirt - Size S, Green T-Shirt Size M, etc. But then I’m wondering how you’d keep things organized in the gallery view, having a card per Color / Product / Size doesn’t look optimal, it would be nice to have a small table in each card with the size and quantities. Hope I’m clear! Many thanks!

Julian answers: Hi Jeremy, very cool - I used to work in the farming world. You can achieve what you’re describing by creating what I’d call a summary table. Make a copy of the Products table with all the same fields and records, and call it ‘Product Summary’. In the original Products table, add a new line for every unique combination of size, color, type. You will still reference this table in your sold and received tables to add/remove inventory. Also in your original Products table, create a linked record field to the summary table, and then link each S,M,L etc to the correct record (which doesn’t have a size) in the Product Summary table. Now in the summary table, you can create Rollup field types that summarize inventory of each product by size using the controls in the Rollup to sum only records that are size S etc. In your gallery view, you can toggle each of those rollups on to see S,M,L etc. If you run into any issues trying this out, post some screenshots here and I’ll help you out :slight_smile:

Jeremy: Hi Julian many thanks for your super quick and very useful answer. I gave it a go on your template, I’ll post some screenshots on the 3rings forum to make sure I understood well. I’m not native english speaker, so sometimes I may do some misinterpretation!

Also, correct me if I’m wrong, but if I want to use the same picture for a product, whatever its size, or add another kind of information that’s the same for a given product whatever its size, such as Material Composition, I should put it in the New Products Summary table, am I right? So that every time I add a new product, the main table becomes the Products Summary table.

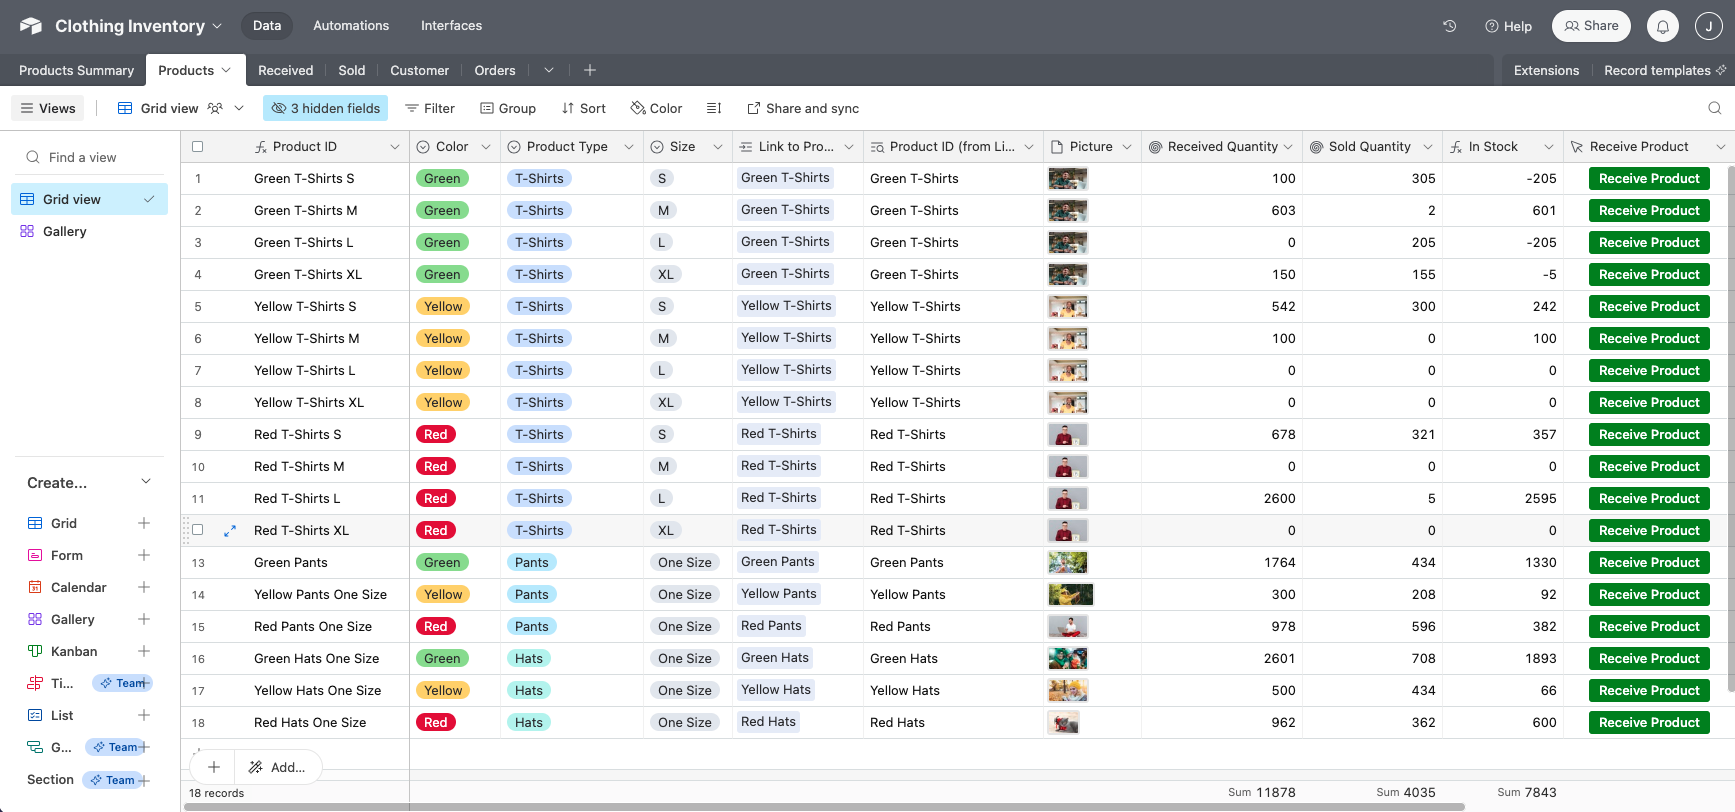
Below : Original Products table with Size and link to Products Summary table

Below: New Products Summary table with stock by size & Rollup field to do so

Red arrow: is this a good interpretation of what you advised when saying "Now in the summary table, you can create Rollup field types that summarize inventory of each product by size using the controls in the Rollup to sum only records that are size S etc. "?

(sorry for multiple posts I’m not allowed by the system to post more than one screenshot at a time)

Below: Products summary Gallery with Stock by size

Hi Jeremy, yes this is exactly what I was thinking! Does this get you what you were looking for?

And yes I agree about the picture or material composition fields: If the same picture is used for all sizes of a product, it makes sense to set the picture in the “Product Summary” table and then you can look it up in the “Products” table so you don’t have to add it twice. Another way to look at these two tables is that “Product Summary” is actually “Products” and “Products” is really “Product Variations”. Same relationship, but a different way to name it.

1 Like

Yes it’s what I was looking for. I’ll have to adapt a bit to my business which is a little bit more complex than our example, but it helps a lot. Many thanks again!

1 Like

Hello, i love the idea of this and i am trying to implement this for my business, but i want to keep track of the stock i have of each size of shirt that i have, how would I do this?

Hi Jon! Welcome to the community. I recommend checking out this post, where I offered a solution for Jeremy, who had the same goal. Take a look and let me know if you have any follow up questions.

Hi there, thank you for the very helpful video. I also have clothing stock that i want to record by size - I saw your post to Jeremy, i havent worked through this solution yet as i wanted to check something else first. I am going to be selling clothing at an event and want to use the Sold form for the staff (without logins to airtable) to record the outgoing stock with each customer, and have it linked to the inventory. Ive set up my base as you showed in your video. But is it possible to make size a field on the sold form? That then also links to the product table, and overall stock levels? Otherwise unless i am mistaken staff would need to select the product id on the sold form, and then scroll through a long list of each sized garment. Thank you for your assistance!

I have now also created the product summary table with roll ups from Jeremy’s question, but is there a way to change the form so you can select product type and then size without scrolling through the long list of product ids? Thank you!

What a great tutorial. Thank you Julian. A final step that I would love to add is some way of seeing visually or even being notified through an automation that the inventory for a particular product is low.

The quantity that triggers the warning would be different for each product, but I’d like to be pinged when it’s time to reorder something.

Andreas

Hi Julian, thank you for all your helpful videos. I tried to add in the formula for my airtable form automation but I’m running into an issue when I try to check that the form works. The error message states “Sorry, the page you were looking for was not found.” I have a date and time field name and format within my form so I believe that added abit of complexity.

Sign in - Airtable’ &

‘DATETIME_FORMAT({Available Appointment Time and Date}, “YYYY-MM-DDTHH:mm:ss.SSSZ”)’ &

‘?’ &

‘prefill_Guest%20ID=’ & RECORD_ID() & ‘&’ &

‘prefill_Guest%20Name=’ & ENCODE_URL_COMPONENT({First Name}) & ‘&’ &

‘hide_Guest%20ID=true’

Thank you so much! That was very efficient video for me.

Hi Sammie, Welcome to the forum! What is the purpose of the DATETIME_FORMAT function there? the beginning URL and end prefills look good (I’m assuming this is an interface form?) But a DATETIME_FORMAT function is used to output a string of text. If you want to use it to prefill a field with that date as text, it would look something like:

'prefill_Field=' &
ENCODE_URL_COMPONENT(DATETIME_FORMAT({Available Appointment Time and Date},'MMDDYYYY'))

This would be a great addition!

Hi Jessie!
Sorry I missed this. Unfortunately, there isn’t a way to limit the results based on a previous field, like only showing Smalls when they select small from a dropdown. We call this conditional filtering of linked records and it’s a highly requested Airtable feature that is rumored to be coming to us sometime in the future.